yo Grizz,
You'll have to separate the ABS Tone Ring from Rotor;

"...80-96 rotor replacement requires removing the hub assembly & driving out the lug studs.
On 93-96 Broncos only, the tone ring must be removed..."
"Rotor Installation

1. Set the rotor onto the back of the hub.
2. Drive the lug studs through both.
3. If applicable (93-96 Bronco only), install the tone ring.
4. Drop the packed inner wheel bearing into its race in the back of the hub, & apply a ring of grease to its visible surface.
5. Install the appropriate inner wheel seal.
6. Flip the assembly & apply a heavy ring of grease to the area between the bearing races in the hub.
7. Slip the hub onto the spindle, keeping as much grease as possible inside.
8. Fill as much of the hub as possible with grease, up to the outer wheel bearing race.
9. Slip the packed outer bearing onto the spindle, centering the hub around it so it goes in all the way.
10. Leaving any excess grease in place, install the wheel bearing adjusting nut(s) according to the appropriate procedure.
11. Fill the area between the nut(s) & hub wall with grease, NOT to extend outboard of the nuts.
12. Install any necessary hardware & the hub locks..." By Steve
More info @
http://www.supermotors.net/registry/2742/12739#content
&
How to press rotors without taking them to a machine shop; see the supermotors link below for more pic
by Sackman
http://www.supermotors.net/registry/19344/74348
This write up shows you how to press your rotors on your Bronco's and F150's 4x4's.
So you got a rotor you need to replace, and you don't want to spend the money for a rotor with a new hub. The difference in price is a lot. I pay $29.99 for a new rotor, then press off my hub from the old, and press on to the new. With the hub already on, your paying nearly $100 a piece for them.
You got to start with the old rotor fully off the truck (I'm sure there's a write up to show you how to get to this point).
First step is to knock out the studs. I'm using a 4lb hammer. Might be a little overkill, but not much effort is needed
rotor is equipped with a tone ring
once the studs are loose, they will then rest on the tone ring
going around the studs and tapping them will a little bit of force and you'll pop the tone ring right off
Next step is to remove the hub from the old rotor (it wont be attached no more) and use the old rotor for a base to do the set up.
I put the hub into the old rotor upside down
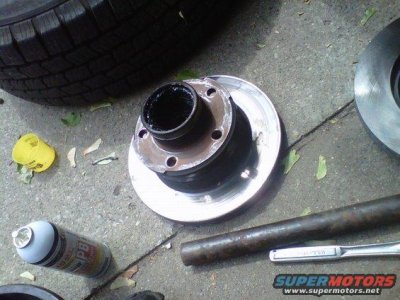
Then I take the new rotor and lay it onto the hub
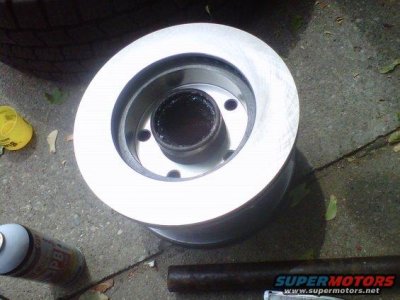
Next step is to place the studs back into the holes and take a punch and drive them in just enough to hold the rotor onto the hub. Then I flip the rotor and lay it onto the old rotor. Now, the raised part of the old rotor fits inside the new rotor and will keep the good surface away from being damaged while pressing the studs back in the rest of the way.
Next you'll need an open lug nut. It can not be a capped lug nut. Tighten it up to pull the stud a little bit through.This will get the stud up enough to have enough threads to grab.
Now, You'll need to come up with a way to pull the studs all the way through so the shoulders are fully through. Using just the lugnut will not allow the shoulders to penetrate all the way through. This is what I use......
1 1/4" socket, 3/4" drive opening to allow the stud to go all the way through the socket. This socket is perfect to do this job.
place the socket onto the stud that already part way through
put the open lug nut inside the socket onto the studI use my impact socket on the lug nut to pull the stud through
You want the shoulder of the stud to be all the way through like this
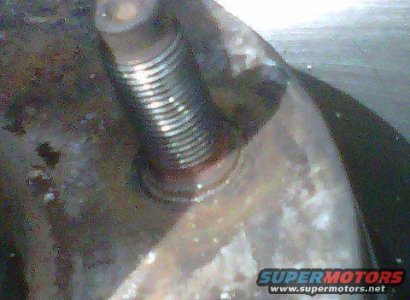
Here's what the stud should look like from the backside if fully seated
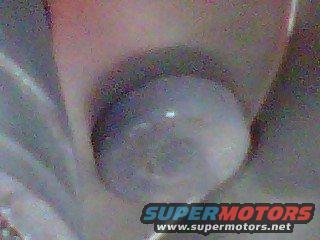
Now they are ready to reinstall. The machine shop around my house will charge you $30 a rotor to do this simple procedure."
I hope this helps those of you that want to try this yourself. It really isn't all that hard to do and will save you a bit of money too.
Here's what it'll look like if you need to keep pressing it through
Once they are all nice and tight, it's time to reinstall the tone ring if you have ABS. Just tap it on being careful not to use too much force.
If it looks like this, keep pressing it through as its not fully seated.." see pic
========================

"Wheel bearing adjusting nut (2.5-inch rounded hex) for 3-***** auto hub locks only. This nut requires so little torque to install that it can usually be removed with a screwdriver by hand. But the locking clip that slips into the inner grooves in the threads MUST be removed first.
This is the INBOARD surface of the nut, which faces the wheel bearing. .." by Steve
--
Also
"Spindle Differences '80-96

In addition to the ~'92 loss of a spindle stud (leaving 5) and the addition of 2 notches in the spindle ****** (Bronco only) for the 4WABS sensor used on '93-96 Broncos only, the spindle was also redesigned in ~'95 to match the revised 2-piece inner wheel seal. F150 spindle flanges were never notched or drilled for the 4WABS sensor, but are otherwise identical to the corresponding Bronco's.."
=====
I know that Ford changed the 3 ***** Auto Hubs in mid year 95 and all 96 Broncos, so ensure the repair manual you have shows correct torque and parts diagram for your 94.


