Yo ledzilla,
Welcome to our Bronco DIY site!
Ask away.
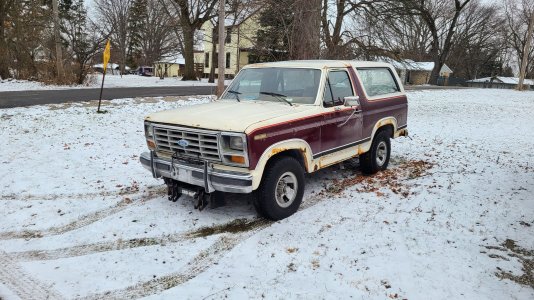
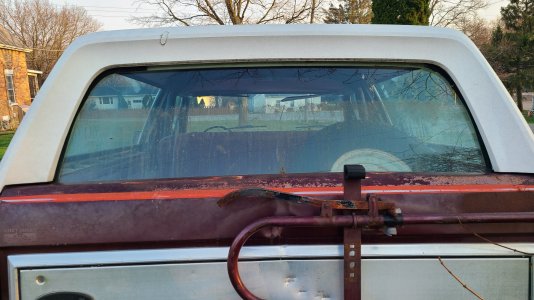
Let's yak away on the tailgate :
83 wiring Diagram: :
View attachment 31001
"All '80-96 t/g wiring runs from the dash switch (F2TZ-14529-A Motorcraft SW7071 ~$25~65) out the firewall along the frame to the rear bumper up to the L taillight and into the t/g. '80-86 have a large round 3-wire connector in the LHR taillight well; those with rear defrost also have a 1-wire connector. All years with rear defrost have a ground ring screwed to the body in the taillight well. I think '87-91 have the large round connector in front of the taillight AND a smaller round 4-wire connector inside the frame at the LHR body mount. '92-96 only have the frame connector.
Normal operation is as follows:
RAISE from the dash switch:
Power flows thru fuse 14 thru the LB/BK wire thru the IP switch UP contacts thru the P/LG wire thru the key switch UP contacts thru the Y/R wire to the motor brushes, commutator, & windings; then it grounds thru the motor's internal CB, out thru the R/Y wire thru the latch switch thru the T/Bk wire thru the key switch DOWN contacts thru the Pk/LB wire thru the IP switch DOWN contacts to the Bk wire to the ground in the kick panel (or dash on older Broncos).
LOWER from the dash switch:
Power flows thru fuse 14 thru the LB/BK wire thru the IP switch DOWN contacts thru the Pk/LB wire thru the key switch DOWN contacts thru the T/Bk wire thru the latch switch thru the R/Y wire thru the motor's internal CB to the motor brushes, commutator, & windings; then it grounds out thru the Y/R wire thru the key switch UP contacts thru the P/LG wire thru the IP switch UP contacts to the Bk wire to the ground in the kick panel (or dash on older Broncos).
RAISE from the key switch:
Power flows thru fuse 12 thru the BK/Wh wire thru the key switch thru the UP contacts thru the Y/R wire to the motor brushes, commutator, & windings; then it grounds thru the motor's internal CB out thru the R/Y wire thru the latch switch thru the T/Bk wire thru the key switch DOWN contacts thru the Pk/LB wire thru the IP switch DOWN contacts to the Bk wire to the ground in the kick panel (or dash on older Broncos).
LOWER from the key switch:
Power flows thru fuse 12 thru the BK/Wh wire thru the key switch DOWN contacts thru the T/Bk wire thru the latch switch thru the R/Y wire thru the motor's internal CB to the motor brushes, commutator, & windings; then it grounds out thru the Y/R wire thru the key switch UP contacts thru the P/LG wire thru the IP switch UP contacts to the Bk wire to the ground in the kick panel (or dash on older Broncos).
Note that in ALL cases, EVERY switch is used, and the circuit ALWAYS grounds at the same point.
To eliminate/bypass the dash switch, unplug it & install 2 jumpers as described in the "neutral position" within the diagram. If that text isn't legible, click the pic to supersize it. The following diagram shows how to semipermanently bypass either switch, as well as some other modifications. By Sreve
⊙
Here's the 1983 Dealer Brochure by Ford via p
The Old Car Manual Project Brochure Collection
For certain 83s, such as those with a 351 engine, see Electronic Engine Control III (EEC III) overview, wiring & Vacuum diagrams on the net by Tommy @ Wayback Machine
Also see: DIY EEC III Timing Procedure by Eric,
DONOTDELETE @
EEC III - Off-Road Forums & Discussion Groups
1983 Bronco 5.8L 351W 4V H.O Vacuum Diagram by our friend and member Seabronc (Fred) Rest in Peace
FRIEND!
View attachment 31002
See my mostly recovered site by schwim @
Ford Bronco And F-150 Links - FORD BRONCO It contains boo-koo component repairs, installation & parts sources!